
Part 1 - The Git Graph
Series: How to Suck Less at Git
Part 1 of 3
This is part 1 of a series of posts where we look at how to use the most essential tools that should be in every developer’s git toolbox. I assume only that the reader is familiar with git basics like status and commit.
Once you’ve “graduated” from this little bootcamp, you’ll never worry about releasing the wrong code again, and you’ll be able to craft selective releases like an absolute pro. I hope to make you stop thinking of git as a place to shove your code, and instead as an imperative part of crafting that code.
The Git Graph
Section titled: The Git GraphGit is a graph. Every commit that you make is a node on that graph. Everything you do in git changes this graph. The graph shows everything you do in git.
Consulting the git graph is absolutely imperative to use git correctly. Not reading the graph is like not having your monitor plugged in or never executing the code you just wrote; even if you’re confident you hit the right keys, can you ever be certain without checking your work?
I recommend checking the graph after every step in your git process. Execute the step and then double check with the graph that it did exactly what you were expecting. That might sound like a lot, but checking the graph is fast. You’re just looking at the top section that you just modified. Again, it’s a lot like looking at the monitor to ensure the key that you just pressed is the one that appears on the screen.
Viewing the graph
Section titled: Viewing the graphWithout further adieu, open up ~/.gitconfig in a text editor (it will be in your home/username directory).
Paste these lines to the bottom of the file:
[alias]  pretty  = log --pretty=format:"%C(auto)%h%d\\ %s\\ %C(cyan)[%aN]" # Colorize a one-line version of the log  lsb     = !git pretty --graph          # List all commits on the current branch  ls      = !git pretty --graph --all    # List all commits on all branches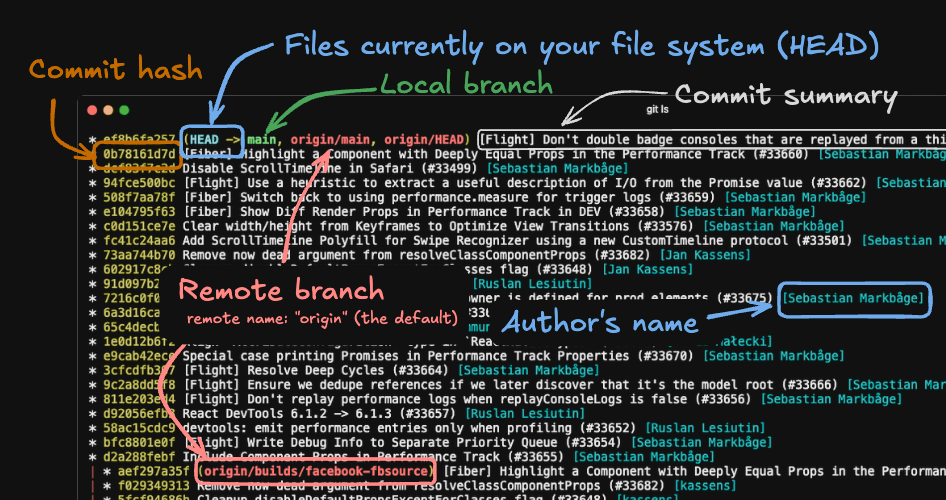
[pull] ff = only # Make git pull not evil anymoreYou now have a new git command available: git ls! The unix ls command “lists” all the files in your current directory, and your new git ls command lists all the git commits and their relationships to each other; a.k.a. the git graph!
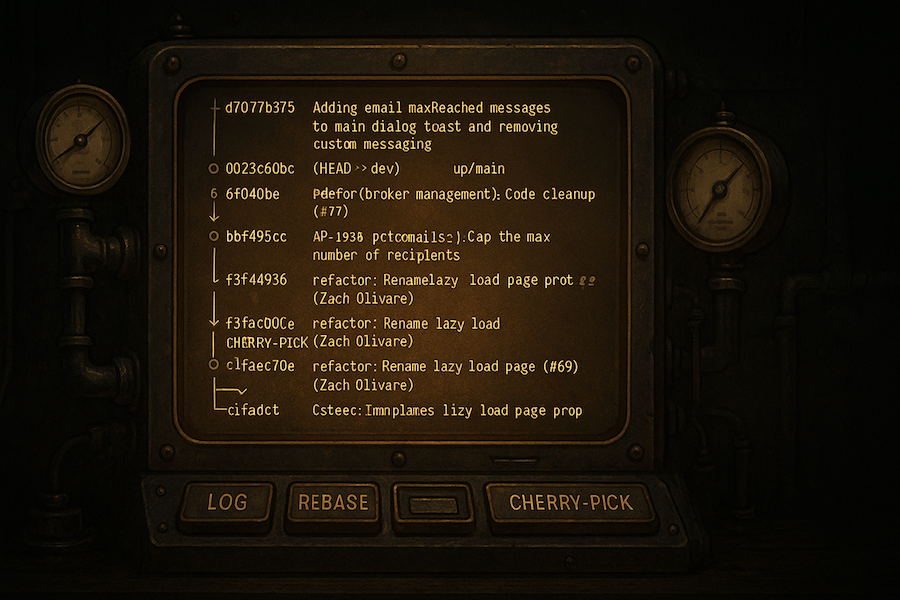
Let’s give it a go. cd into any git repo and run git ls. You should see something resembling the following:
Congratulations! You’ve taken your first step on the journey to not sucking at git.
Shape of the graph
Section titled: Shape of the graphThe Git Graph is useless if you and your team can’t understand it. Crafting a graph that is easy to understand has two parts:
- Writing good commit messages (see the next section)
- Keeping a linear history
Linear Git History
Section titled: Linear Git History“A Git history is linear if no two commits share a parent, unless one of them is a merge commit.
What does that look like?
* 8a216b5 fix: Reduce the amount or resting and spreading that happens (#10)|\ | * 2cde5bd test: Write initial tests| * ebaebdc chore: Install jest| * 142f34b fix: Reduce the amount or resting and spreading that happens|/ * a90b6f0 v0.0.7* 7e23344 fix: Issues with arrays and missing dots* e353fc2 (tag: v0.0.4) v0.0.4|\ | * 231b741 fix(db-connection): Do not specify response type as GremlinResponse (#9)| * df68940 fix(db-connection): Remove the execute() function (#8)| * 9bc6865 fix(query): Prepend hasLabel() command with a dot (#7)| * f0a3317 feat(query): Support multiple ids in the g.V() query (#6)|/ * 5d17c04 (tag: v0.0.3) v0.0.3* ab567c5 Merge pull request #1 from zposten/dev|\ | * 854f8c6 feat(query): Add all cosmos supported query Gremlin query steps| * a8f8329 doc: Remove wrapper function from usage example|/ * 56aee7d (tag: v0.0.2) v0.0.2|\ | * 4514c0a chore: Switch build from ES to CJS| * e8d77db doc: Create README| * 30858b5 feat: Create initial library| * 4c95d7a chore: Use rollup to bundle typescript project|/ * cebdad4 Initial commitWhen there are multiple developers working on a project, there are two primary mechanisms for keeping a history linear:
- Squashing pull requests: squashing a PR means that all of your commits are combined into one single commit, which is plopped on top of the latest
main(or other target branch). There are tradeoffs to squashing that you should consider. - Rebasing pull requests: rebasing a PR essentially “replays” each one of your commits on top of the latest
main. We discuss rebasing in more detail in part 2 of this series. The biggest downside of rebasing is just making everyone on the team comfortable with the process.
My suggestion is to:
- Squash single-commit PRs. If your PR only has one commit, merging that PR via a merge commit doubles (1→2) the commits for this PR and makes the history a little harder to read, without adding any benefit.
- Rebase multi-commit PRs. This ensures that the useful information from your atomic commits aren’t lost after your PR is merged.
Most commit messages leave a lot to be desired
Section titled: Most commit messages leave a lot to be desiredI and many others have written at length on how to write outstanding git commit messages.
But we can worry about getting to “outstanding” later. For now, let’s make sure your commit messages send the right signal — that they were written by a professional who knows their craft.
The three most important rules are:
-
Actually describe what you did.
fix ugly,add test,lint,nvm,FOO-695. How are those messages helping your team understand your code? You haven’t said anything useful. -
Keep. It. Short. The first line of a git commit is a SUMMARY. That means you don’t have to tell your life story. Summarize what you did so that it can be easily distinguished from all the other commits by people who are not you. If someone asked you what was in this commit but was literally running away from you to get to a meeting, what would you shout at them?
-
Use consistent formatting. Again, there is nuance to deciding what that format should be. But if you pay attention to capitalization and punctuation you should be able to just use the same format as the rest of your team.
This applies to merging PRs too
Section titled: This applies to merging PRs tooWhen you merge a PR, that also creates a git commit. So those three rules also apply to that little dialog that pops up when you click merge that asks you to confirm your merge/squash commit text.
Conveniently, there’s a shortcut for this one: When you merge a PR, use your PR title as the git commit summary.
When merging PRs, do not leave the default merge text. Merged in FOO-123 (pull request #573) What is anyone supposed to do with that?? Without consulting one or two external tools, this text is absolutely meaningless. The good news is you have already done the work to describe this set of commits: It’s the title of your PR. When you merge a PR, copy the title that you wrote and make it the first line of the merge box. Add (PR #XXX) to the end and you’re done.
- Suggested format:
<PR title> (PR #XXX) - Example:
FOO-123 Prevent UI from mutating uploaded docs during submission (PR #875)